Build Mode: Difference between revisions
Created page with "==Introduction== Welcome to the Build Studio, an unrestricted space for pure architectural creativity! Build Studio is a creative space free from any restrictions on furniture or presets. Freely use any material to bring your architectural visions to life! ==Basic Controls== === What is Build Studio? === Build Studio is a space dedicated solely to construction. From complex structures to detailed interiors, unleash your creativity to the fullest. Raise walls, pl..." |
No edit summary |
||
| (17 intermediate revisions by the same user not shown) | |||
| Line 1: | Line 1: | ||
{{stub}} | |||
{{see also|Build Studio}} | |||
{{Getting started heading}} | |||
[[File:build mode0.png|350px|right]] | |||
In [[Build Mode]], you can [[furniture|decorate]] the [[homes]] and [[streets]] where your [[Zois]] live. Click the '''Build Mode''' icon at the bottom right of the screen or press the '''[1]''' key to get started. | |||
Why not try building the home you've always dreamed of? Use [[Meow]] to purchase [[furniture]] and place it wherever you like. | |||
== | ==Basic Features== | ||
[[File:build mode1.png|350px|right]] | |||
[[File:build mode2.png|350px|right]] | |||
To start building, click the [[Build Mode]] icon in the bottom-right corner of the screen or press '''[1]''' on your keyboard. | |||
From the list on the left, you can browse and purchase various [[structures]] and [[furniture]] [[items]] to place in your space. Use the search function to quickly find the furniture you need. At the top of the screen, you'll find tools to switch [[floors]], toggle the [[grid]], adjust snapping, select or delete rooms, clear everything, and even move the entire lot or [[house]]. | |||
== | ==Building Presets== | ||
[[File:build mode3.png|350px|right]] | |||
In the [[Building Presets]] tab, you can choose from a variety of ready-made [[presets]]. | |||
Using a preset lets you create a stylish [[home]] or [[room]] without having to build or decorate it from scratch. | |||
== | ==Building a Home== | ||
[[File:build mode4.png|350px|right]] | |||
[[File:build mode5.png|350px|right]] | |||
To design your own home, in the [[Structure]] tab, you can find essential building elements like [[walls]], [[doors]], [[windows]], [[stairs]], and [[rooms]]. Use them to create a strong [[foundation]] and design a stunning architectural masterpiece. | |||
== | ==Place Furniture== | ||
[[File:build mode6.png|350px|right]] | |||
Once you've finished designing the [[exterior]] of your [[building]], it's time to decorate the inside. | |||
The [[Furniture]] tab offers a wide selection of [[items]] to choose from. Fill your home with pieces that match your taste and make the space truly your own. | |||
== | ==Customize Furniture== | ||
[[File:build mode7.png|350px|right]] | |||
Click on any placed [[furniture]] or [[structure]] to open a menu with various options. | |||
Select the '''[[Edit Color and Material]]''' button to apply different [[colors]] and [[textures]] to your furniture and structures. You can also use the [[AI Texture]] [[AI Features|Feature]] or import your own image file to apply a custom texture. | |||
== | ==Create Custom Furniture== | ||
[[File:build mode8.png|350px|right]] | |||
[[File:build mode9.png|350px|right]] | |||
To create more unique and personalized furniture, in the [[Custom]] tab, use the [[3D Printer]] and [[Custom Furniture]] features to design entirely new pieces. | |||
With the 3D Printer, you can turn your own images into custom furniture and bring ideas beyond your imagination to life. | |||
Click on Custom Furniture to combine parts and create one-of-a-kind pieces that reflect your personal style. | |||
== | ==Upload to Canvas== | ||
[[File:build mode10.png|350px|right]] | |||
[[File:build mode11.png|350px|right]] | |||
Capture stunning shots of your custom [[lots]] and [[rooms]] and show them off to other [[Creators]]. | |||
Click the '''Save Property Preset''' button or use the [[room selection tool]] to choose a [[room]], then click '''Save Room Preset''' to save your [[property]] or room. Saved lots and rooms can be found in the [[Build Presets]] tab. | |||
Click the Upload to [[Canvas]] button to share your saved preset on Canvas. | |||
[[Category:Getting Started]] [[Category:Game Mechanics]] [[Category:Game Features]] [[Category:Guides]] | |||
Latest revision as of 06:31, 30 March 2025
- See also: Build Studio
|
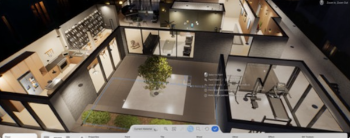
In Build Mode, you can decorate the homes and streets where your Zois live. Click the Build Mode icon at the bottom right of the screen or press the [1] key to get started.
Why not try building the home you've always dreamed of? Use Meow to purchase furniture and place it wherever you like.
Basic Features
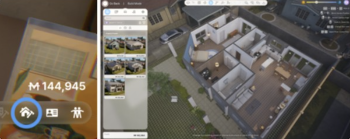
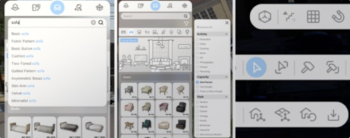
To start building, click the Build Mode icon in the bottom-right corner of the screen or press [1] on your keyboard.
From the list on the left, you can browse and purchase various structures and furniture items to place in your space. Use the search function to quickly find the furniture you need. At the top of the screen, you'll find tools to switch floors, toggle the grid, adjust snapping, select or delete rooms, clear everything, and even move the entire lot or house.
Building Presets
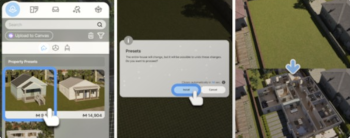
In the Building Presets tab, you can choose from a variety of ready-made presets.
Using a preset lets you create a stylish home or room without having to build or decorate it from scratch.
Building a Home
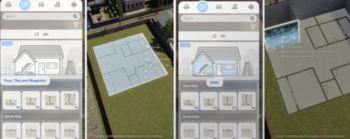
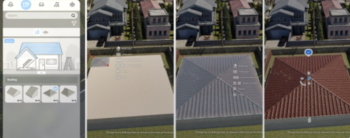
To design your own home, in the Structure tab, you can find essential building elements like walls, doors, windows, stairs, and rooms. Use them to create a strong foundation and design a stunning architectural masterpiece.
Place Furniture
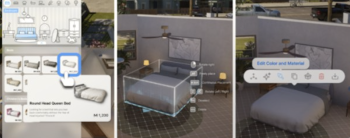
Once you've finished designing the exterior of your building, it's time to decorate the inside. The Furniture tab offers a wide selection of items to choose from. Fill your home with pieces that match your taste and make the space truly your own.
Customize Furniture
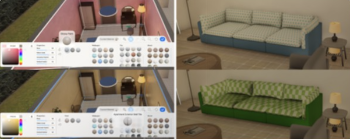
Click on any placed furniture or structure to open a menu with various options. Select the Edit Color and Material button to apply different colors and textures to your furniture and structures. You can also use the AI Texture Feature or import your own image file to apply a custom texture.
Create Custom Furniture
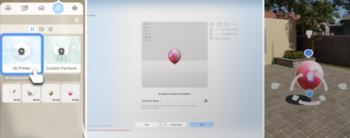
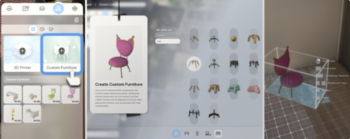
To create more unique and personalized furniture, in the Custom tab, use the 3D Printer and Custom Furniture features to design entirely new pieces.
With the 3D Printer, you can turn your own images into custom furniture and bring ideas beyond your imagination to life.
Click on Custom Furniture to combine parts and create one-of-a-kind pieces that reflect your personal style.
Upload to Canvas
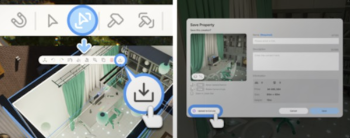
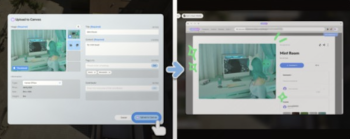
Capture stunning shots of your custom lots and rooms and show them off to other Creators.
Click the Save Property Preset button or use the room selection tool to choose a room, then click Save Room Preset to save your property or room. Saved lots and rooms can be found in the Build Presets tab.
Click the Upload to Canvas button to share your saved preset on Canvas.

